Getting your recipe ready...

Easter dirt cake casserole

Easter dirt cake casserole
60min Total Time
12 people Servings
Easy Difficulty
Budget Cost
450 kcal Calories

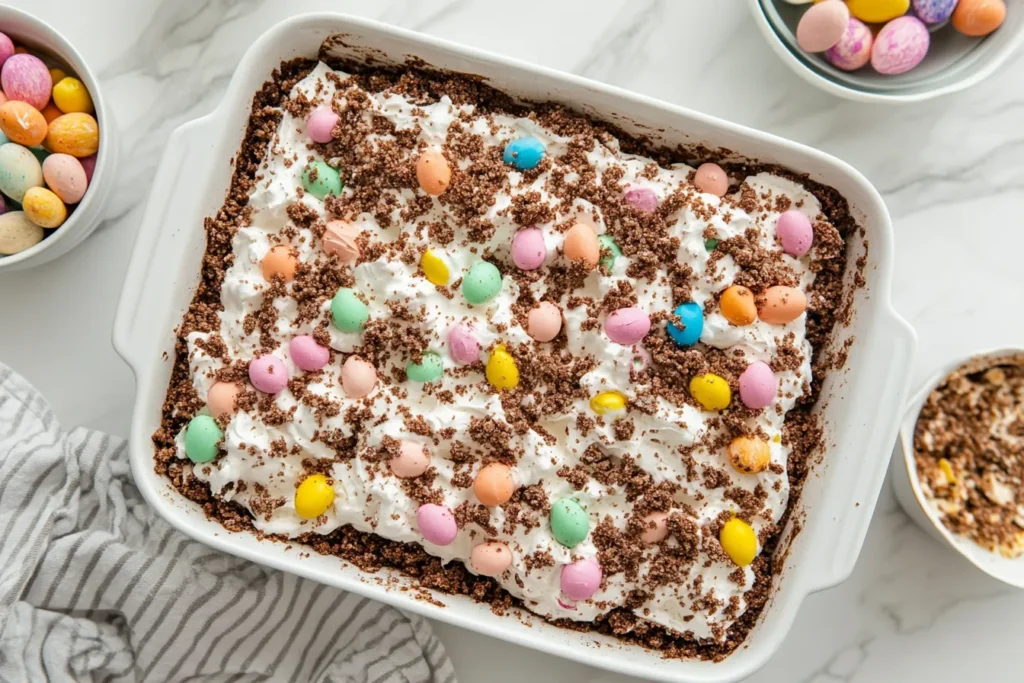
It’s cake, it’s dirt, it’s Easter magic.

Video

Note: This video is from YouTube and does not belong to us. All rights go to its original creator. Watch on YouTube

Ingredients

12
  • 2 packages (14.3 oz each) original Oreo cookies, finely crushed in a food processor until they resemble dirt
  • 2 packages (8 oz each) cream cheese, softened to room temperature for smooth blending
  • 1 cup unsalted butter, softened to create a creamy texture
  • 2 packages (3.4 oz each) instant chocolate pudding mix for rich chocolate flavor
  • 3 cups cold whole milk for making the pudding mixture
  • 1 container (16 oz) frozen whipped topping, thawed completely
  • 1 package gummy worms for decorating the 'dirt' surface
  • Assorted Easter candies like chocolate eggs and bunny decorations
  • Green-tinted coconut flakes for creating grass effects
  • Pastel-colored sprinkles for festive Easter appeal

Instructions

1

Begin by preheating your oven to 350F (175C) to create the perfect baking environment for your dirt cake casserole

2

In a large mixing bowl, beat the softened cream cheese and butter together until completely smooth and creamy, about 3-4 minutes

3

In a separate bowl, whisk together the chocolate pudding mix and cold milk until it begins to thicken, approximately 2 minutes

4

Gently fold the chocolate pudding mixture into the cream cheese mixture until well combined and smooth

5

Carefully fold in the thawed whipped topping until the mixture is light and fluffy, being careful not to overmix

6

In a 9x13 inch casserole dish, create alternating layers of crushed Oreos and cream mixture, starting and ending with the Oreo layer

7

Smooth the top layer of 'dirt' carefully to create an even surface for decorating

8

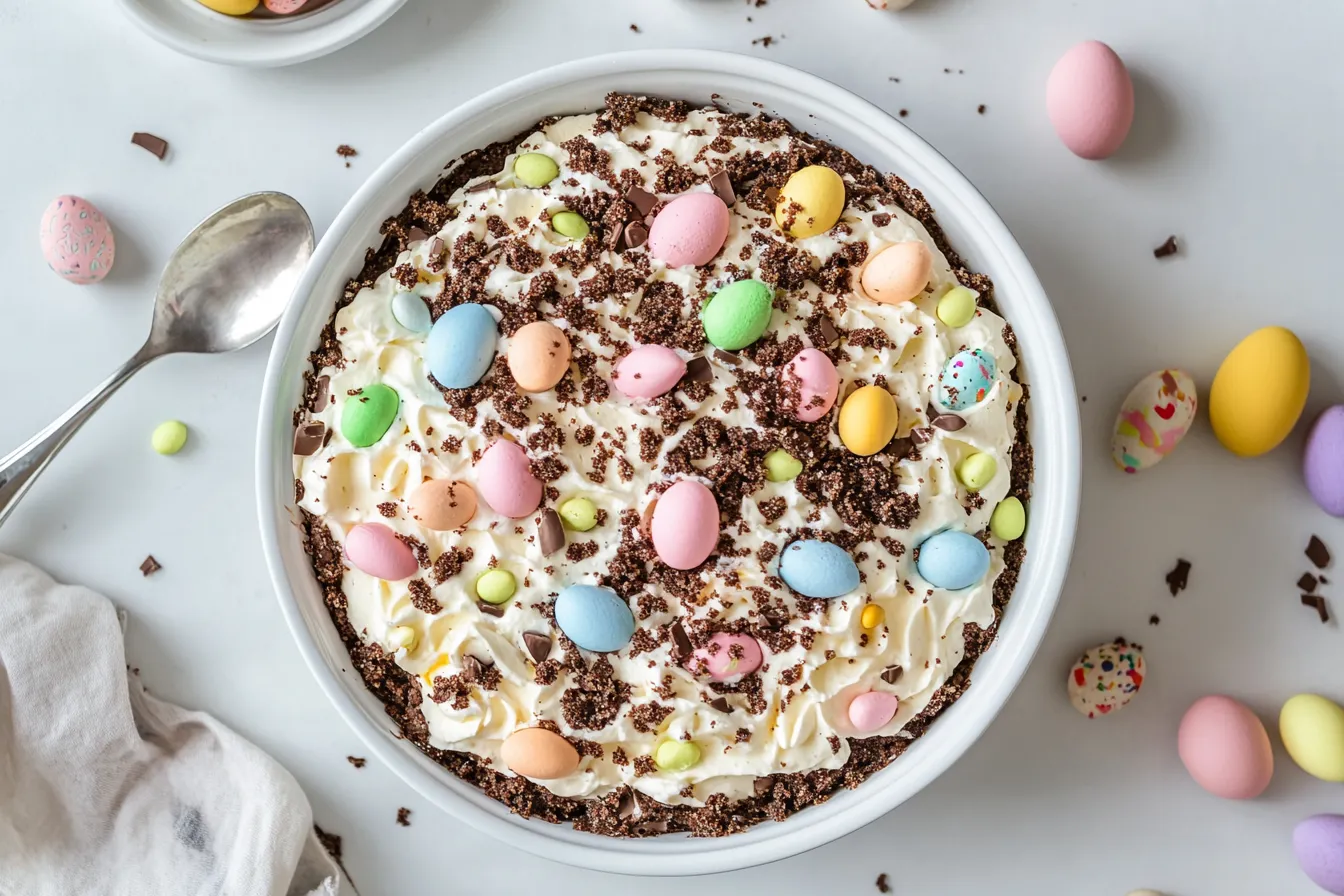
Arrange gummy worms, Easter candies, and green coconut 'grass' on top to create a festive garden scene

9

Refrigerate for at least 4 hours or overnight to allow all flavors to meld together perfectly

10

Just before serving, add additional decorative Easter elements and sprinkles for extra festive appeal

Kitchen Tools

  • 9x13 inch clear glass casserole dish for optimal presentation
  • Electric mixer for creaming butter and cream cheese perfectly
  • Food processor for creating fine Oreo 'dirt'
  • Rubber spatula for gentle folding and smooth spreading
  • Measuring cups and spoons for precise ingredient portions

Chef's Tips

Allow cream cheese and butter to soften naturally at room temperature for 1-2 hours before mixing for the smoothest texture
Use a food processor to achieve uniformly crushed Oreos that truly resemble dirt in appearance
Create clear layers by using a spatula to carefully spread each component evenly before adding the next
Chill the casserole dish before assembling to help layers set more quickly
Reserve some crushed Oreos for touch-ups just before serving if needed

Troubleshooting

If mixture seems too thick, gradually add small amounts of milk until desired consistency is reached
If layers are sliding, chill between each layer addition for better stability
If decorations are sinking, ensure the top layer is firmly set before adding them
If pudding isn't setting properly, ensure milk is very cold when mixing

Recipe Variations

Halloween version: Use orange pudding and spooky decorations instead of Easter themes
Summer garden version: Add fresh mint leaves and berry decorations
Christmas dirt cake: Use red and green sprinkles with holiday-themed candies
Birthday celebration: Incorporate colorful candy sprinkles and birthday cake Oreos

Healthy Alternatives
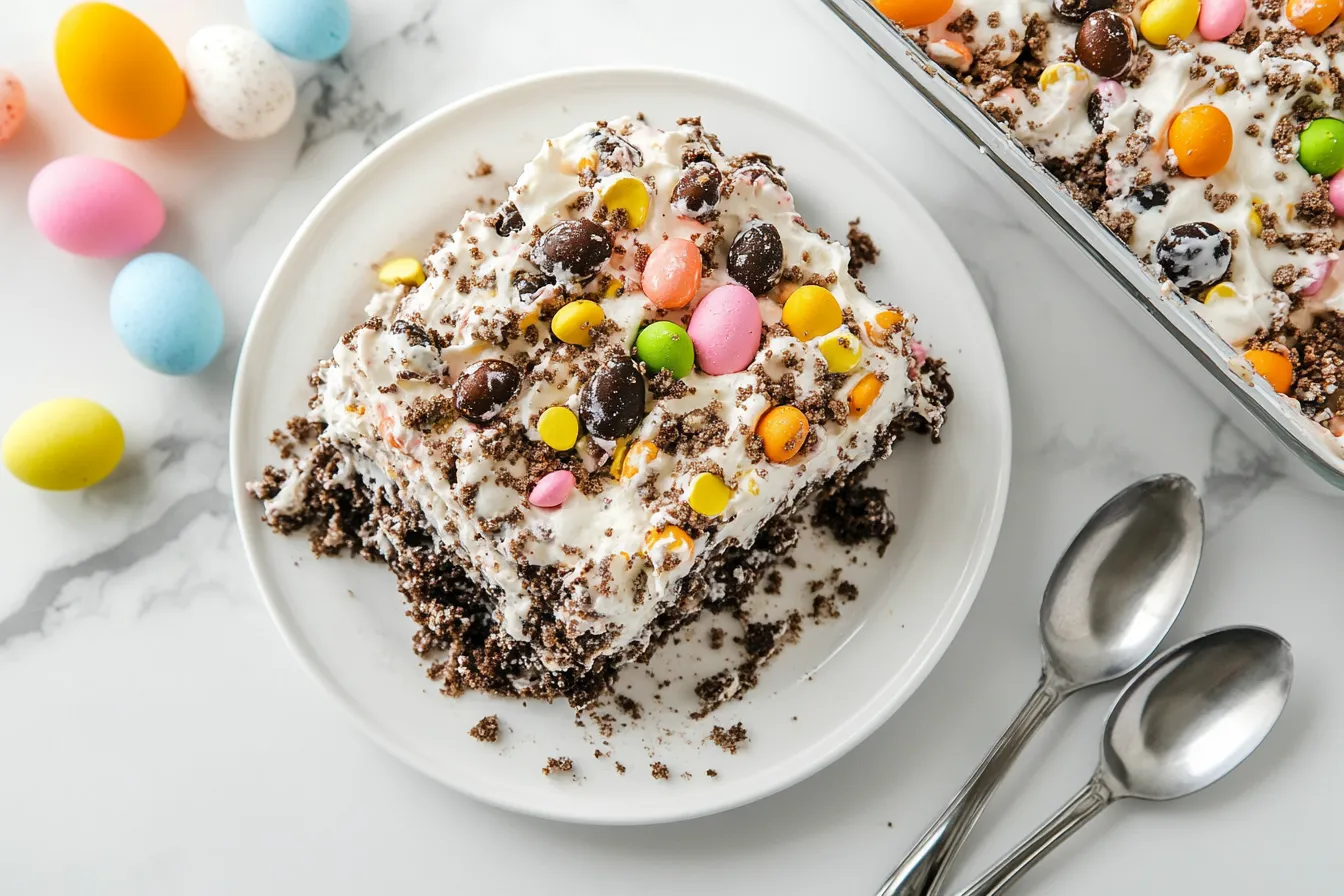
Use reduced-fat cream cheese and light whipped topping to decrease overall calorie content
Substitute sugar-free pudding mix to reduce sugar content while maintaining chocolate flavor
Replace some of the Oreos with chocolate graham cracker crumbs for fewer calories
Use almond milk instead of whole milk for a lighter alternative that's still creamy

Serving Suggestions

Present in a clear glass casserole dish to showcase the beautiful layered effect
Serve chilled with additional fresh whipped cream on the side
Pair with fresh berries for a bright, spring-themed contrast
Consider individual servings in clear plastic cups for easier portion control

Nutrition Facts

450
Calories
6g
Protein
52g
Carbs
25g
Fat
2g
Fiber
35g
Sugar
380mg
Sodium
45mg
Cholesterol

Dietary Info

Vegetarian-friendly dessert casserole
Can be adapted for dairy-free diets using plant-based alternatives
Not suitable for vegan diets due to dairy content
Contains gluten from Oreo cookies

Garnish Ideas

Arrange Easter-themed candy decorations in an artistic pattern across the top
Create patches of green coconut 'grass' throughout the dirt surface
Position gummy worms so they appear to be emerging from the dirt
Add edible flower decorations for a spring garden effect

Storage

Keep refrigerated in an airtight container for up to 5 days maximum freshness
Avoid freezing as it can affect the texture of the cream mixture
Store any leftover decorative elements separately to maintain their appearance
Cover tightly with plastic wrap to prevent the 'dirt' from drying out

Leftover Ideas

Store covered in the refrigerator for up to 5 days maximum freshness
Portion into individual containers for easy grab-and-go desserts
Remove any perishable decorations before storing long-term
Refresh the appearance with new decorations when serving leftover portions

Common Mistakes to Avoid

Using warm or hot milk when making the pudding, which prevents proper setting
Not allowing cream cheese to fully soften, resulting in lumpy texture
Overmixing the whipped topping, which can deflate the mixture
Adding decorations too early, causing them to sink into the layers

Frequently Asked Questions

Can I make this dirt cake casserole ahead of time?

Yes, it's actually better when made 24 hours in advance to allow flavors to develop

How long will this dessert last in the refrigerator?

When properly stored, it will maintain its best quality for up to 5 days

Can I freeze this dirt cake casserole?

Freezing is not recommended as it can affect the texture of the cream mixture

What's the best way to transport this dessert?

Transport in a cooler or insulated carrier to maintain proper temperature and structure

Can I use different cookies for the dirt effect?

Yes, chocolate graham crackers or chocolate sandwich cookies work well as alternatives

How far in advance should I add the decorations?

Add decorative elements no more than 2-3 hours before serving for best appearance

Reviews

Sarah K.
Mar 2, 2026
This Easter dirt cake was the highlight of our family gathering! The layers were perfect and kids went crazy for it!
Michael P.
Feb 26, 2026
Great dessert that really looks like a garden. My only suggestion would be to add more gummy worms.
Linda B.
Feb 23, 2026
Absolutely fantastic! Made this for an Easter party and everyone wanted the recipe.
Robert M.
Mar 5, 2026
Fun and delicious dessert. The cream cheese layer was especially good.
Jennifer T.
Mar 20, 2026
Perfect Easter dessert! My grandkids helped decorate and had so much fun.
David H.
Mar 13, 2026
Really creative and tasty. The layers held up well and looked great.
Emma W.
Mar 6, 2026
Best dirt cake I've ever made! The casserole format made serving so much easier.
Thomas C.
Mar 4, 2026
Excellent recipe that's become our new Easter tradition.
Patricia Y.
Mar 4, 2026
Such a fun dessert to make with kids. Everyone loved the presentation.
William Q.
Mar 19, 2026
Great balance of chocolate and cream. Will definitely make again.
×
Subscribe!